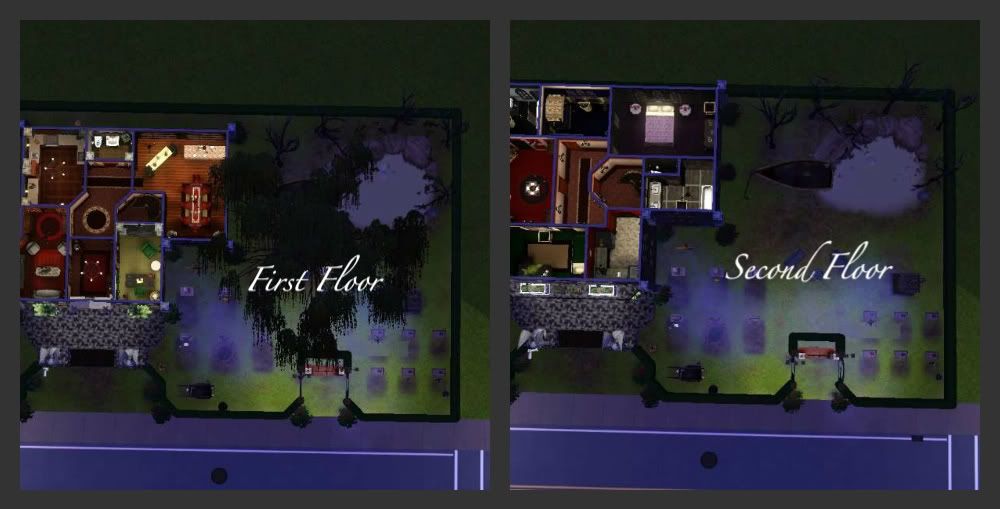
· Opening the Menu. World Adventures is REQUIRED for tomb building. If you don't have it, you won't have access to the tomb building materials. Before beginning, you need to enabled testingcheats.
To do this, press Ctrl+Shift+C and enter "testingcheatsenabled true" (without the quotations as show here):
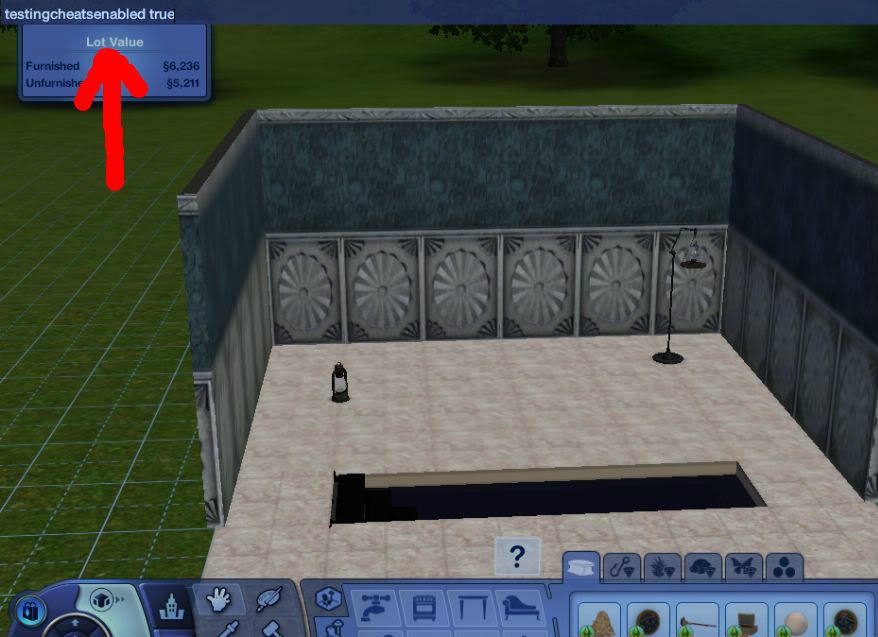
Nothing visually happens yet. Open the blue box again, but type "buydebug" and press Enter.
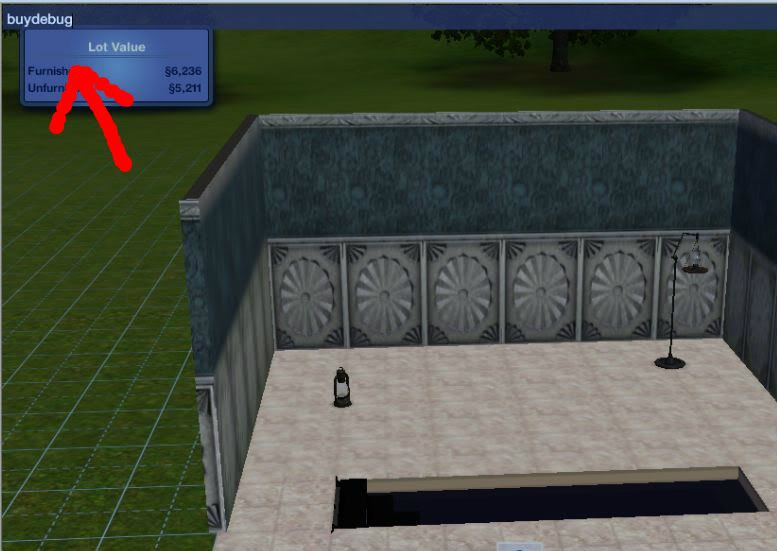
Now when you enter Buy mode, you will see a box with a "?". In the screenshot shown below, it is located above the Comfort category, but if you do not have Pets, it will be located where the Pets category currently is in my screenshot.

Once you have built your tomb, you will want to link your tomb items ONE PAIR AT A TIME. This will prevent damage to brain cells. It can get very confusing if you have too many loose triggers and behaviors.
· Triggers Versus Activated Behaviors. Speaking of damaged cells, I'm going to rewire your brain for the concept of triggers and activated behaviors. Yes, you read that right. Our brains take shortcuts when processing information. Let's take the direction "turn on the light"; without thinking about it, you go and flip a switch that turns on a light. You didn't physically turn on a light, you turned on a switch that then turns on the light.
The light switch is a trigger that is linked up to the actual light, which is an activated behavior. The light switch is either on or off and the light is on or off. They are two separate actions that are linked together. Another way to think about it is with the good old "If, Then" statements. If I flip the light switch "ON", then the light will turn "ON". Understand this and you will have so much creative freedom when tomb building.
· Linking. With the concept in mind, let's link two tomb items to show you how it's done. I'm using a set of stairs and a treasure chest for this example. The treasure chest is found in the buydebug menu we brought up, but the stairs can be any standard set of stairs in the game (spiral staircases do not work for this). Now, we need to know what we want these two items to do so using the "IF, THEN" statement, I will outline how this link will be set up: IF a Sim OPENS the treasure chest [Trigger], THEN the stairs will APPEAR (or UNHIDE) [Activated Behavior].
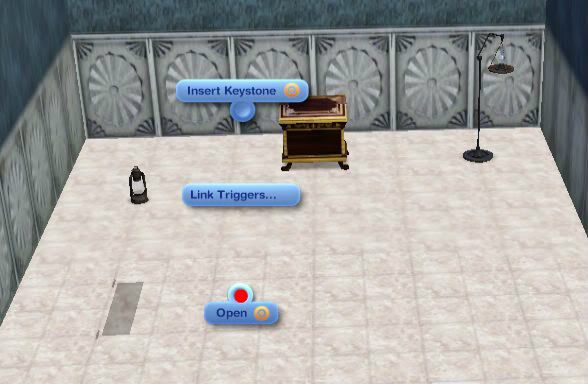
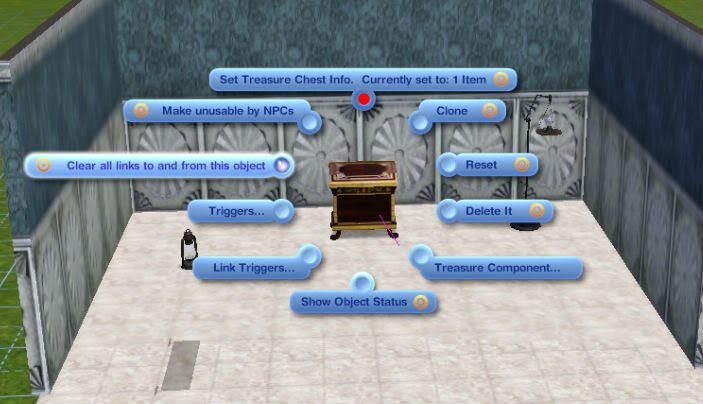
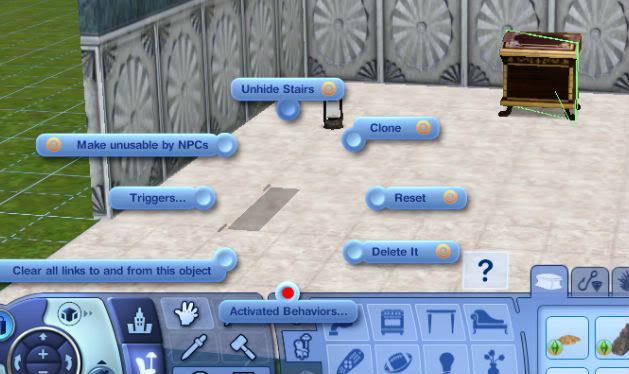
To begin, you must open the menu by pressing Ctrl+Shift while clicking on an object. This allows you to access the menu that set up that object with a link to another object. For our purposes, we will begin with the stairs. In order to create an activated behavior that UNHIDES the stairs, we first need to hide them.
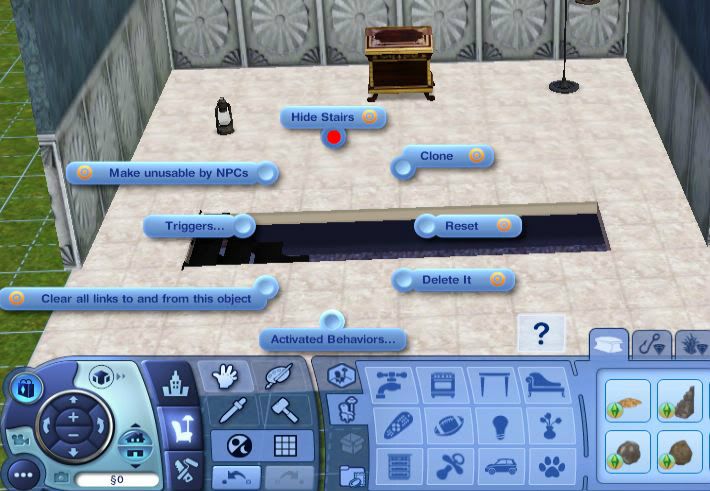
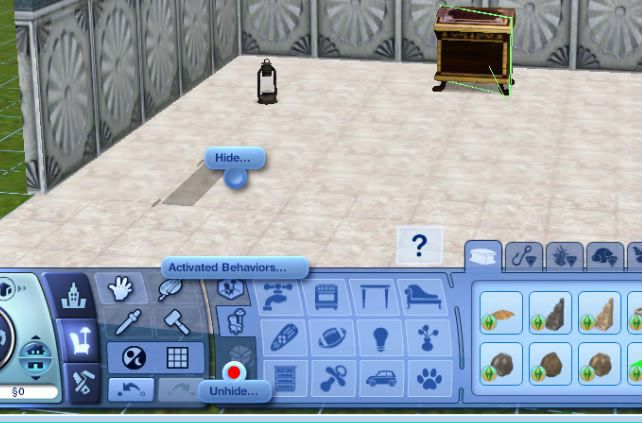
Now you the stairs are covered by floor tiles, matching the room around them. (Note: If you do this on bare terrain, you will have a hole in the ground. If you wish to have stairs outside, I'd recommend them in a "paved" area, not in the grass.) Let's set up the first half of our "IF, THEN" statement: "IF a Sim OPENS the treasure chest". This will be our Trigger. When you open the menu, there will be two options that mention Triggers. When setting a LINK between two objects, always choose Link Triggers.

We want the stairs to UNHIDE when we OPEN the chest, so select OPEN.
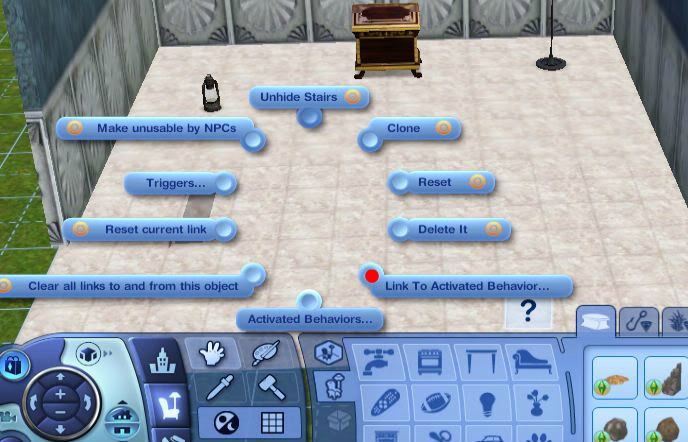
The Trigger is set. Easy right? Now let's set the Activated Behavior. The second half of the "IF, THEN" statement says: "THEN the stairs will APPEAR (or UNHIDE)". Again, we are setting up a LINK so make sure to select Link to Activated Behavior.
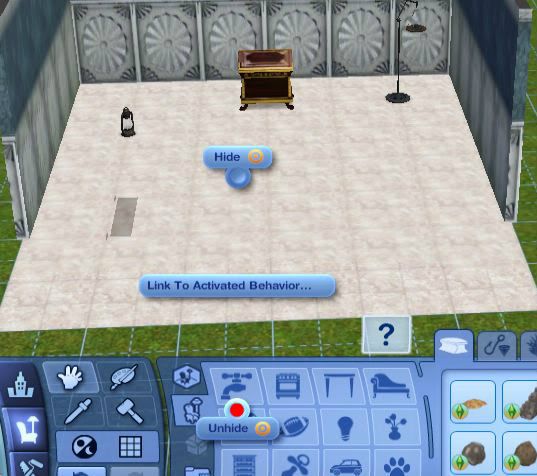
Because we want them to reappear, select UNHIDE.
You have now linked your first tomb items! To verify that it is set up correctly, hover over the two items with your cursor. You should see a pink/purple link connecting the two items when you hover over the treasure chest and a green line connecting them when you hover over the stairs.

If you do not see these lines, clear the links by selecting "Clear all links to and from this object" on both the items and try again.

If you want more than one Activated Behavior to happen when you Trigger and item, you can do this by repeating the steps with the second behavior. For instance, IF a Sim OPENS the chest, THEN the stairs will APPEAR (or UNHIDE) AND the door LOCKS. Set up the first link exactly as I described above, then repeat the IF part of the statement, also known as the Trigger, but then click on the door for the Link to the Activated Behavior portion. When you finish linking the three items you will see lines connecting the door and the stairs to the treasure chest.
If you want more than one Trigger to activate for an Activated Behavior, you will need to use a Processor. I will be posting more tutorials about Tomb Building in the Tips and Tutorials section of our website, including one about the Processor, one of the more complex features of Tomb Building.
· Polishing the Finished Product. Sure you have linked all of your tomb items, but don't forget the polish! Treasure Chests need to be filled and hints and pieces of the storyline need to be given; the tomb would be bland without them. So let's go through that now.
Treasure Chests, Treasure Spawners (the green and yellow Speech bubble), floor and wall holes, dive wells, and sarcophagus' can all give treasure and you can set the treasure you want the tomb item to give by doing the following:
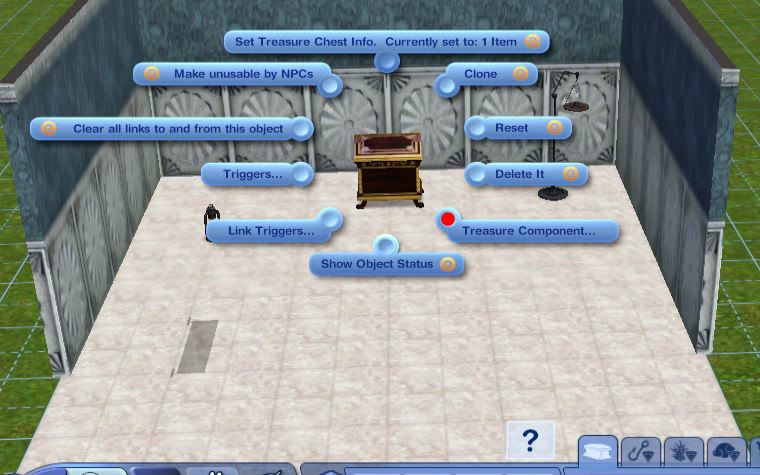
Open the Tomb Building Menu on the Treasure Chest or other item and select Treasure Component.
Now you can select for the tomb item to give a treasure one time, regularly, or both.
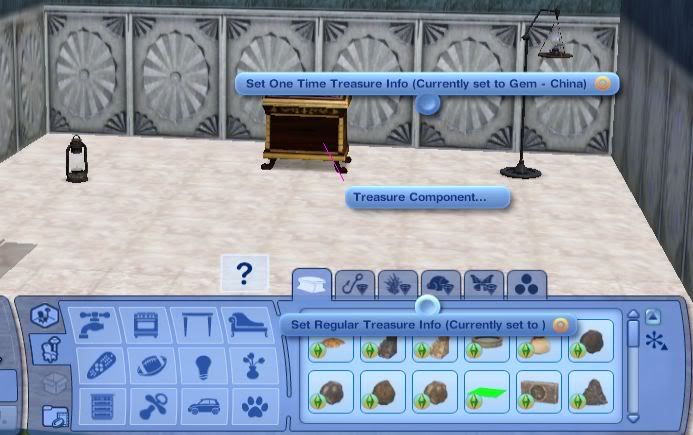
Then select the treasure type you want to be dispensed from the list provided. The "$" are money bags. Ancient coins can be given this way or with the pile provided in the buydebug menu, but the buydebug coin pile does not respawn.

If you want the Treasure Chest, the only tomb item that allows this, to give more than one item at a time, select Set Treasure Chest Info. You can then select for the chest to give up to 5 items.
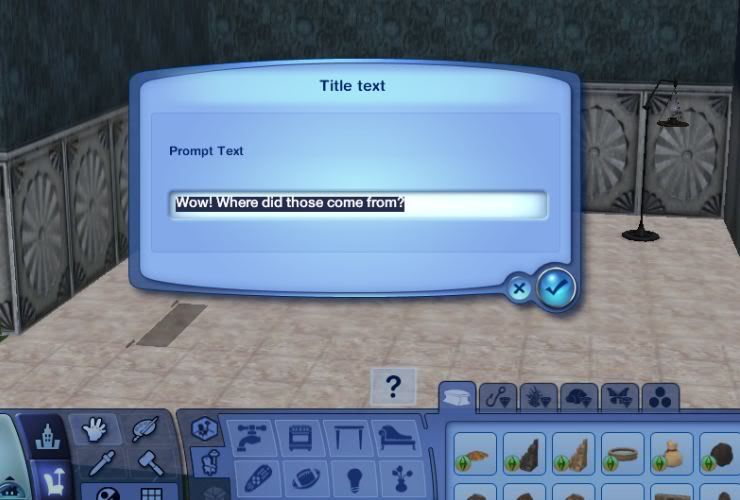
Storyline progression is what makes your tomb unique. You want to know who built the tomb and why. What are they hiding? To help pass this information on to your explorers gradually you can drop hints with plaques and observations. As an example, I'm going to have my Sim exclaim, "Wow! Where did those come from?" when the stairs appear.
First, because I want the message to appear when the stairs appear, the activated behavior, I click on the stairs and open the tomb building menu again. Then click on Activated Behaviors, NOT Link to Activated Behavior. We have already set up the link, now we just want to add a few dazzling details.
Then select UNHIDE because that's what are stairs will be doing.
Next choose the option Set TNS on Activation.

Now enter the text you want to appear. Viola! Instant personalization.
Lastly, we want sparkles! No, really, I mean sparkles. You can set the link of the items to sparkle, letting your explorer know that the tomb item activated something. This is very important, especially when you have tomb items that are linked in separate rooms. The sparkles, or Cause/Effect, act as a hint to your explorers as to what direction to look in for something new, like the now apparent stairs.
You always select the Activated Behavior for this, not the Trigger. So clicking on our Stairs, select Activated Behavior again.
And again, choose UNHIDE.
Finally, select Turn On Cause/Effect FX. Very easy.

Now don't forget to test your final product! I highly suggest linking and testing ONE ROOM at a time if possible. It's easier to locate the issues that need correcting.

If you have specific tomb building questions or other tutorial requests, feel free to post your request for me here.